Table Of Contents
In this guide, I will demonstrate how to add a mirror vdev to an existing ZFS data pool in TrueNAS . Since I needed to add more capacity to my TrueNAS server, I thought I would walk through how easy the process is to expand storage in TrueNAS.
ZFS data pools (zpools) are made up of one or more vdevs. Each vdev contains one or more disks. There are different vdev configuration types to choose from. I prefer to use mirror vdevs because they allow me to add, remove, or upgrade two disks at a time. Other vdev configuration types where 4+ drives are being used in each vdev, requires purchasing a lot more disks at one time. In my opinion, using mirror vdevs is the most budget friendly option for using TrueNAS especially if you use fewer disks at a higher capacity per disk.
One advantage of mirror vdevs is that resilvering is quicker than the other types of vdevs. When you replace a failed disk or you are upgrading an existing disk to a higher capacity disk, the time it takes to resilver and become usable is much faster. With other types, the possibility is greater for more drives to fail during the resilvering process since it takes longer and there are more disks in the pool which could lead to losing all of your data in your pool. Using a RAID-Z2 or RAID-Z3 configuration is more resilient to that issue, but the process is still slower then mirrors.
The biggest disadvantage is that you only have 50% of your overall disk capacity that is usable. However, I think the tradeoff is worth it for the benefits mentioned above. Unless you need a whole lot of storage and need all the capacity you can get out of your drives, I think this is the way to go for many home users as a nice balance between cost per pool expansion
Before Getting Started
Before adding a mirror vdev to my ZFS data pool in TrueNAS, I had some issues with my motherboard SATA ports. ZFS made this apparent with the various read and checksum errors that I was getting (often after rebooting the system). Thankfully it only affected one disk so I did not have to worry about corrupting any data or losing the entire data pool (I do have several backups so I would have been ok if I lost the whole data pool).
Since I bought a used server motherboard so I can have ECC RAM and save some money in the process, the board is likely quite old and so it is not surprising to be having some minor issues with the board.
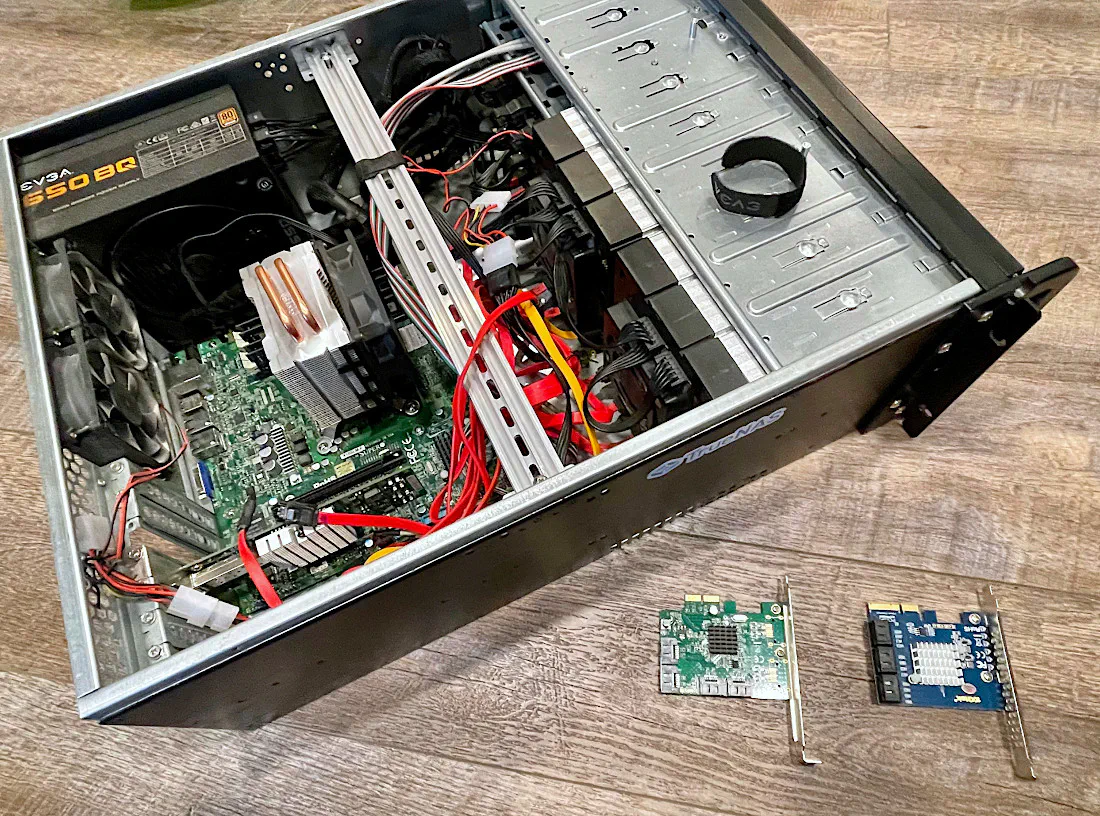
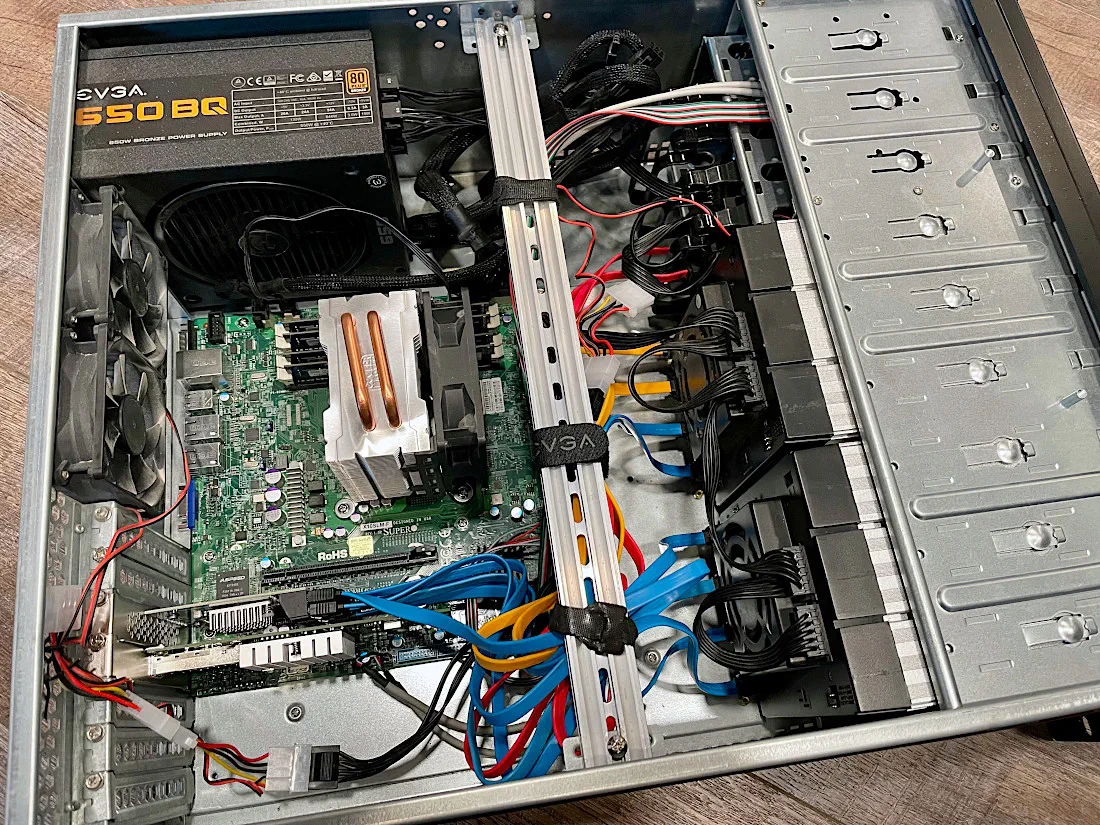
Some of the SATA ports seem to be working well for now, but to avoid potential issues, I decided to remove my old SATA expansion card and replace it with a newer one which uses PCIe 3.0 instead of PCIe 2.0. I also wanted 6 ports instead of 4 so all 6 of my drives can be on the new card. The card might not be able to fully utilize the maximum performance of 6 SATA disks, but since I am using traditional hard disks, performance should be good enough.
I removed my old 4 port SATA card for the new one:
The blue cables are all new cables that came with the PCIe card. I decided to use the new SATA cables that came with the card to minimize the likelihood of having bad SATA cables.
Add New Hard Drives to TrueNAS Server
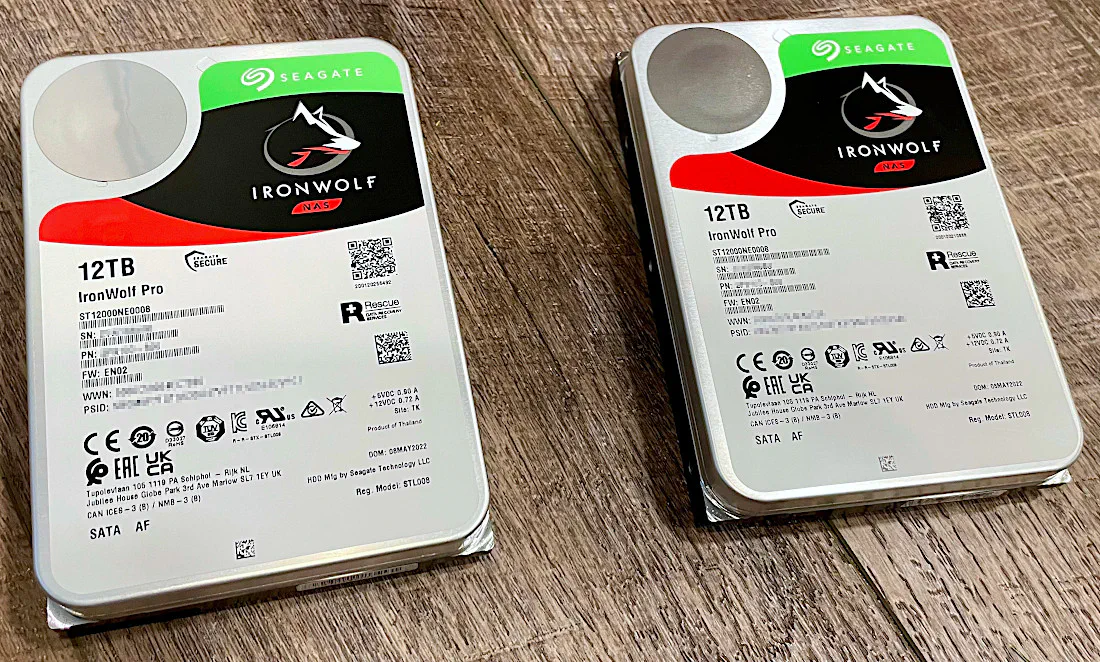
I will be adding two 12 TB Seagate hard drives (affiliate link) to the data pool which will effectively double my existing capacity.
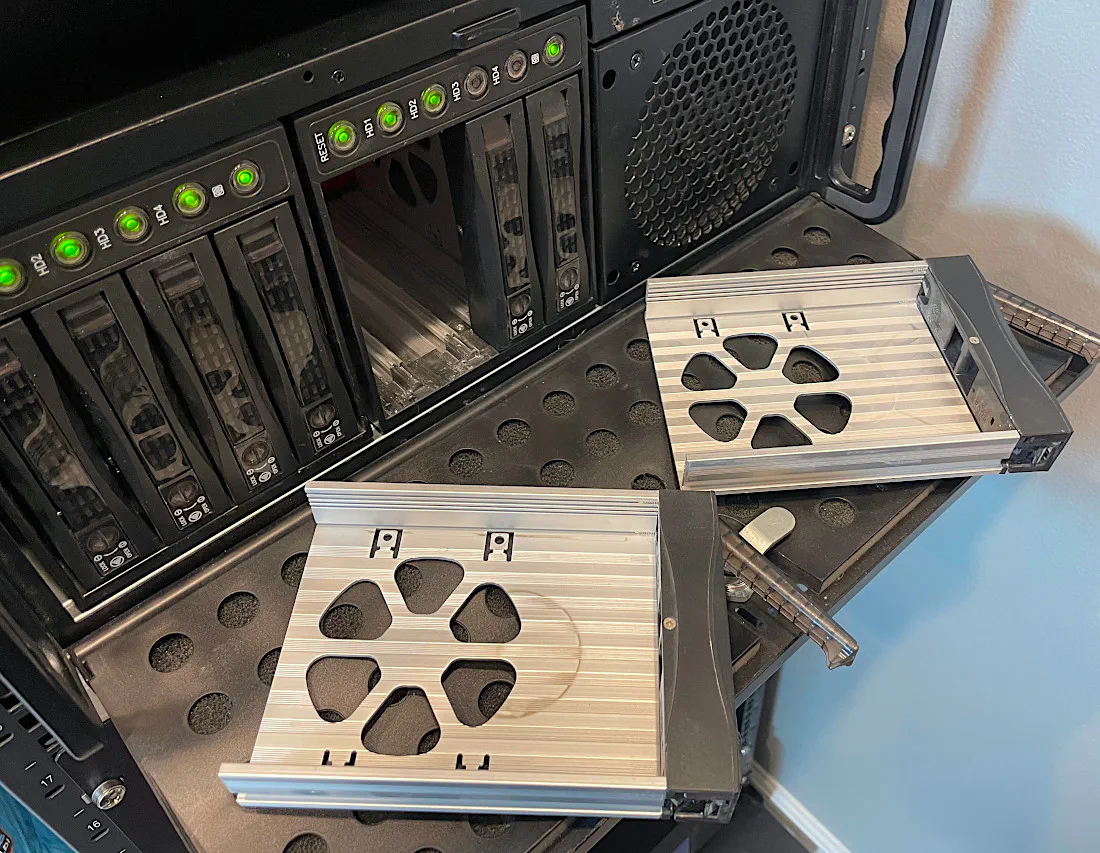
My TrueNAS server has hot swap bays, so I took out the empty trays so I can mount the new hard drives to them. As you can see, I have room for two more disks in the future but I will most likely end up replacing the two oldest drives first since they both are 5-6 years old.
The hard drives are mounted in the trays.
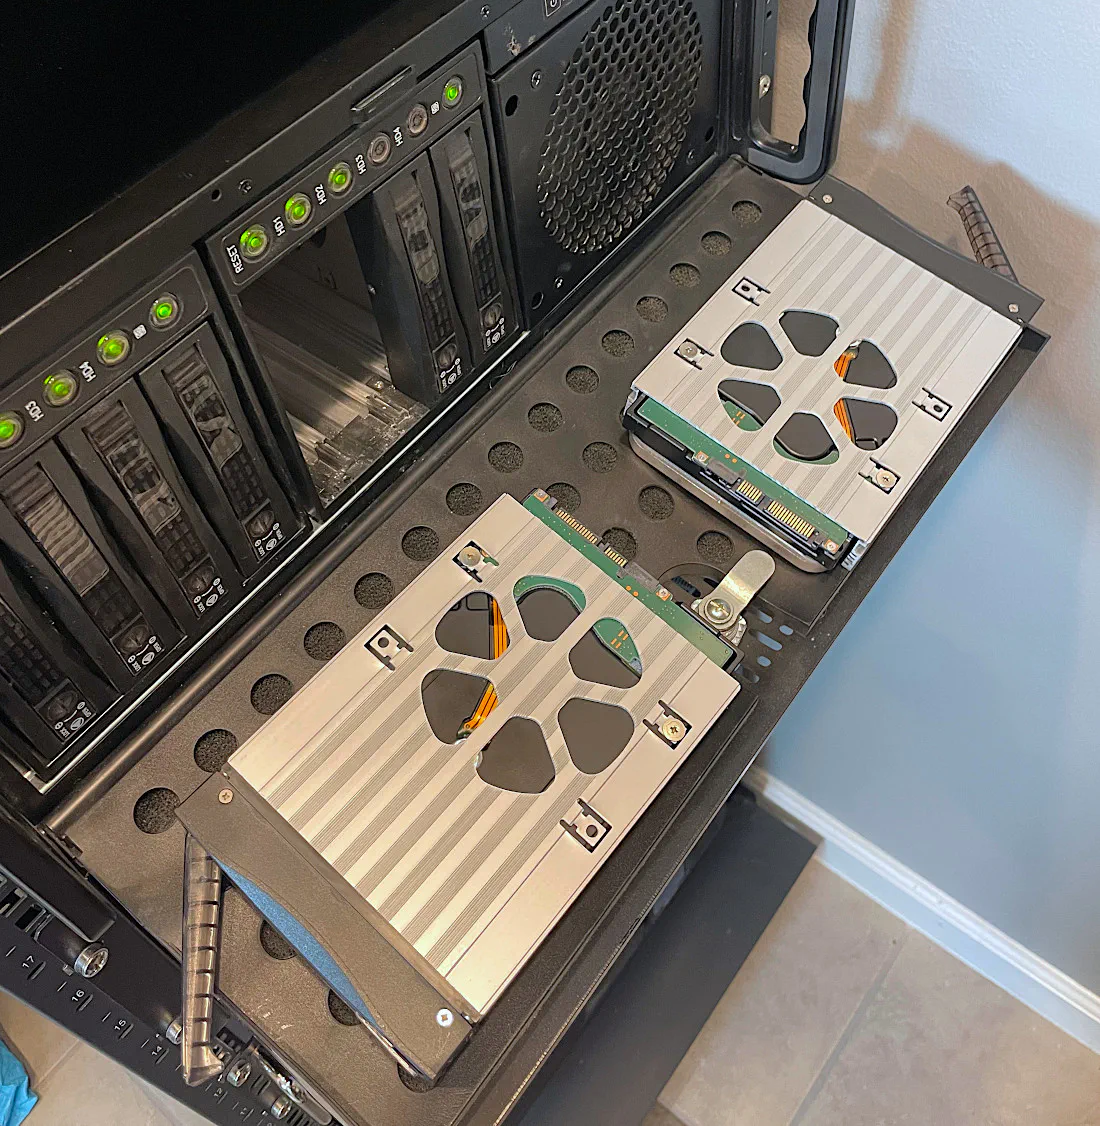
Then I put the trays back into the server. Hot swap bays are so nice because you can add/remove disks very easily. Most systems support hot swapping so you do not even need to reboot your system to recognize the new drives!
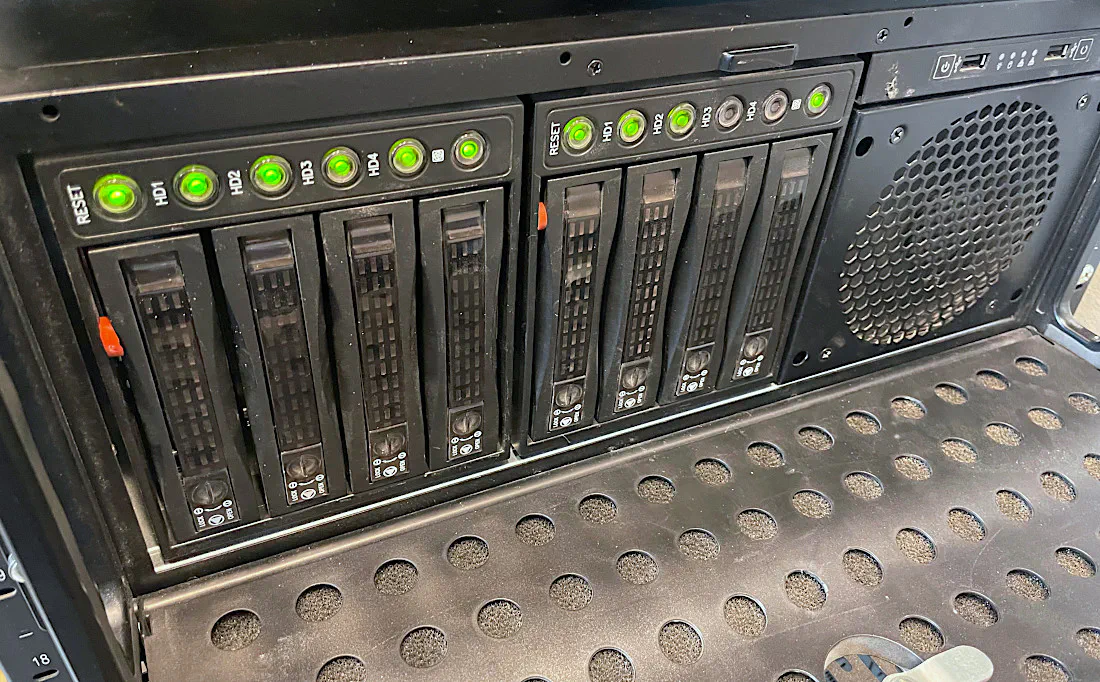
As you can see in the picture, I added two rubber spacers to reduce some vibration noise. The bays did not do that when they were new so it is likely due to aging.
Add Mirror vdev to Existing ZFS Data Pool
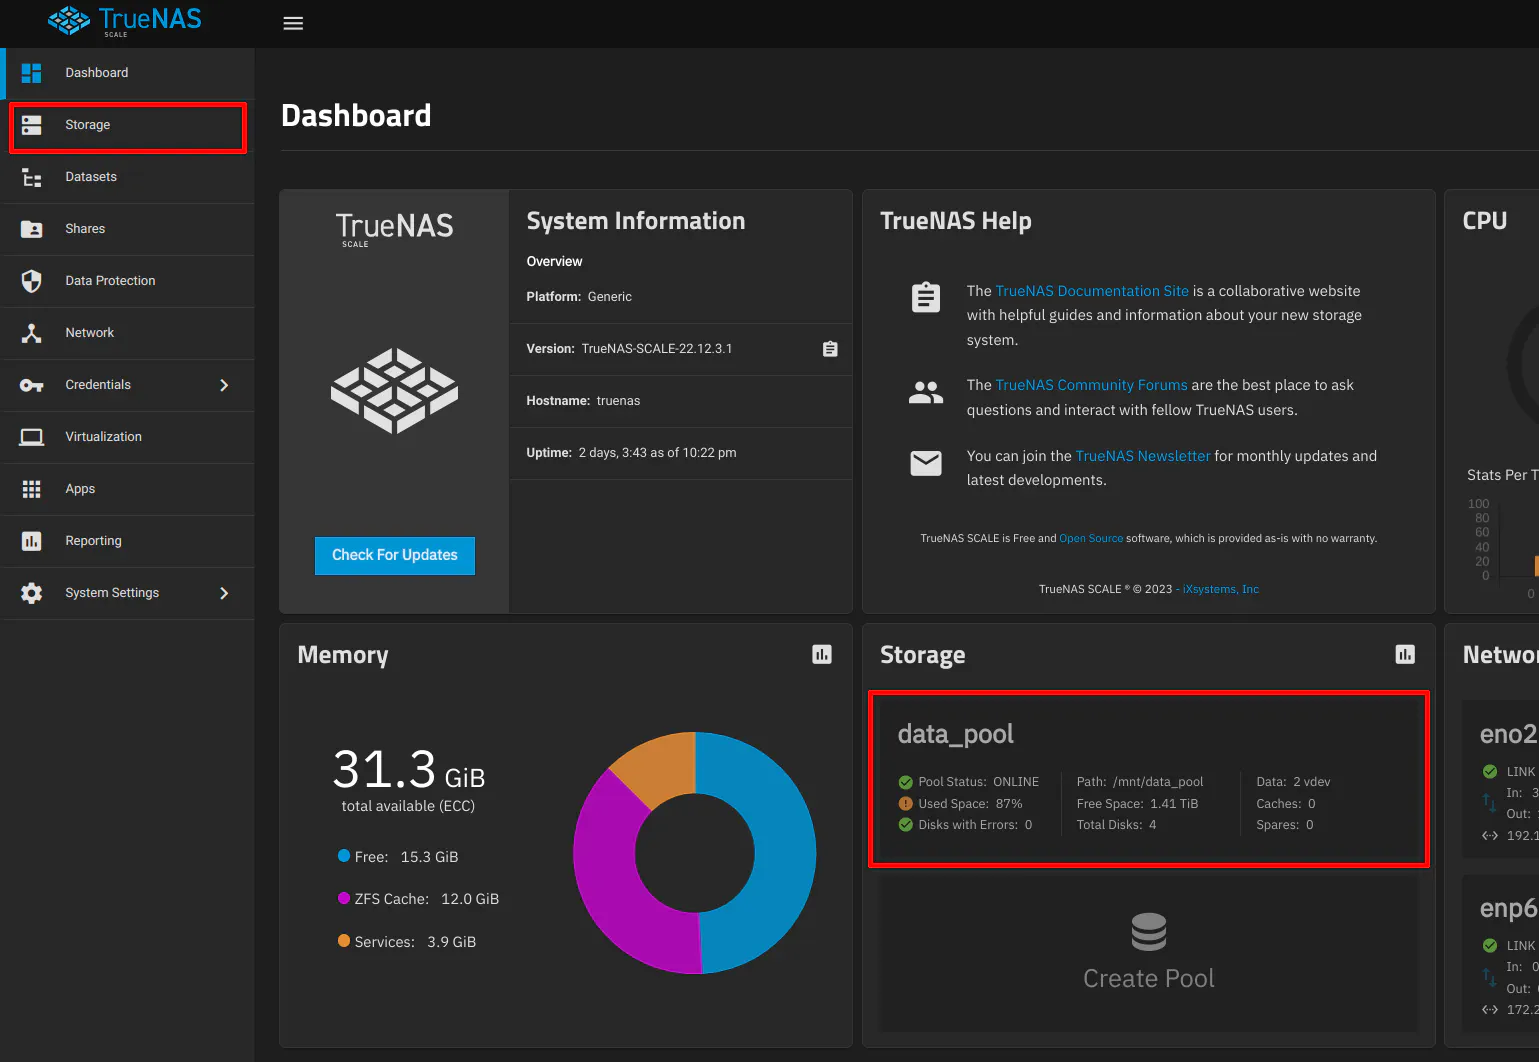
On the “Dashboard” you can see the overall system information and you will see that I have 1.4 TB of free disk space. TrueNAS prefers 80% or less disk utilization for optimal performance. I am not sure how much that affects performance. I decided to add more capacity because I need the additional space and not simply to reduce the utilization below 80% to get rid of the warning (even though that is tempting as well so everything is green indicating a healthy, optimal data pool).
Click on the “Storage” menu option to open the “Storage Dashboard” page.
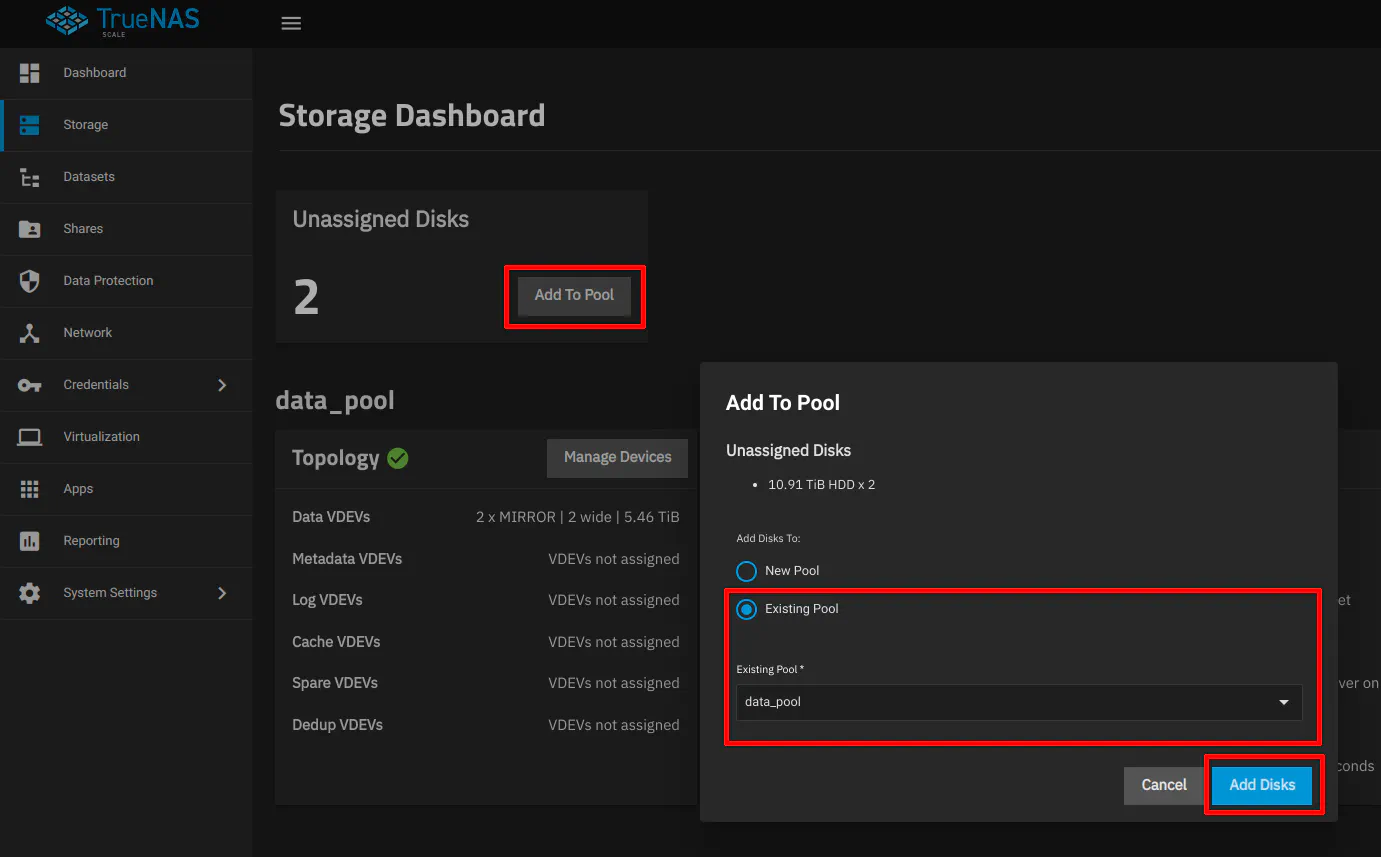
On the “Storage Dashboard” page, you will see the two new disks that I inserted into the TrueNAS server. I did not have to reboot the system so my existing data pool did not have to be taken offline, which is nice.
Click on the “Add To Pool” button to display the “Add To Pool” dialog box. Since I am demonstrating adding to an existing ZFS data pool, click on the “Existing Pool” radio button. Then choose the “Existing Pool” from the dropdown box. My pool is creatively named data_pool. Finally, click “Add Disks”.
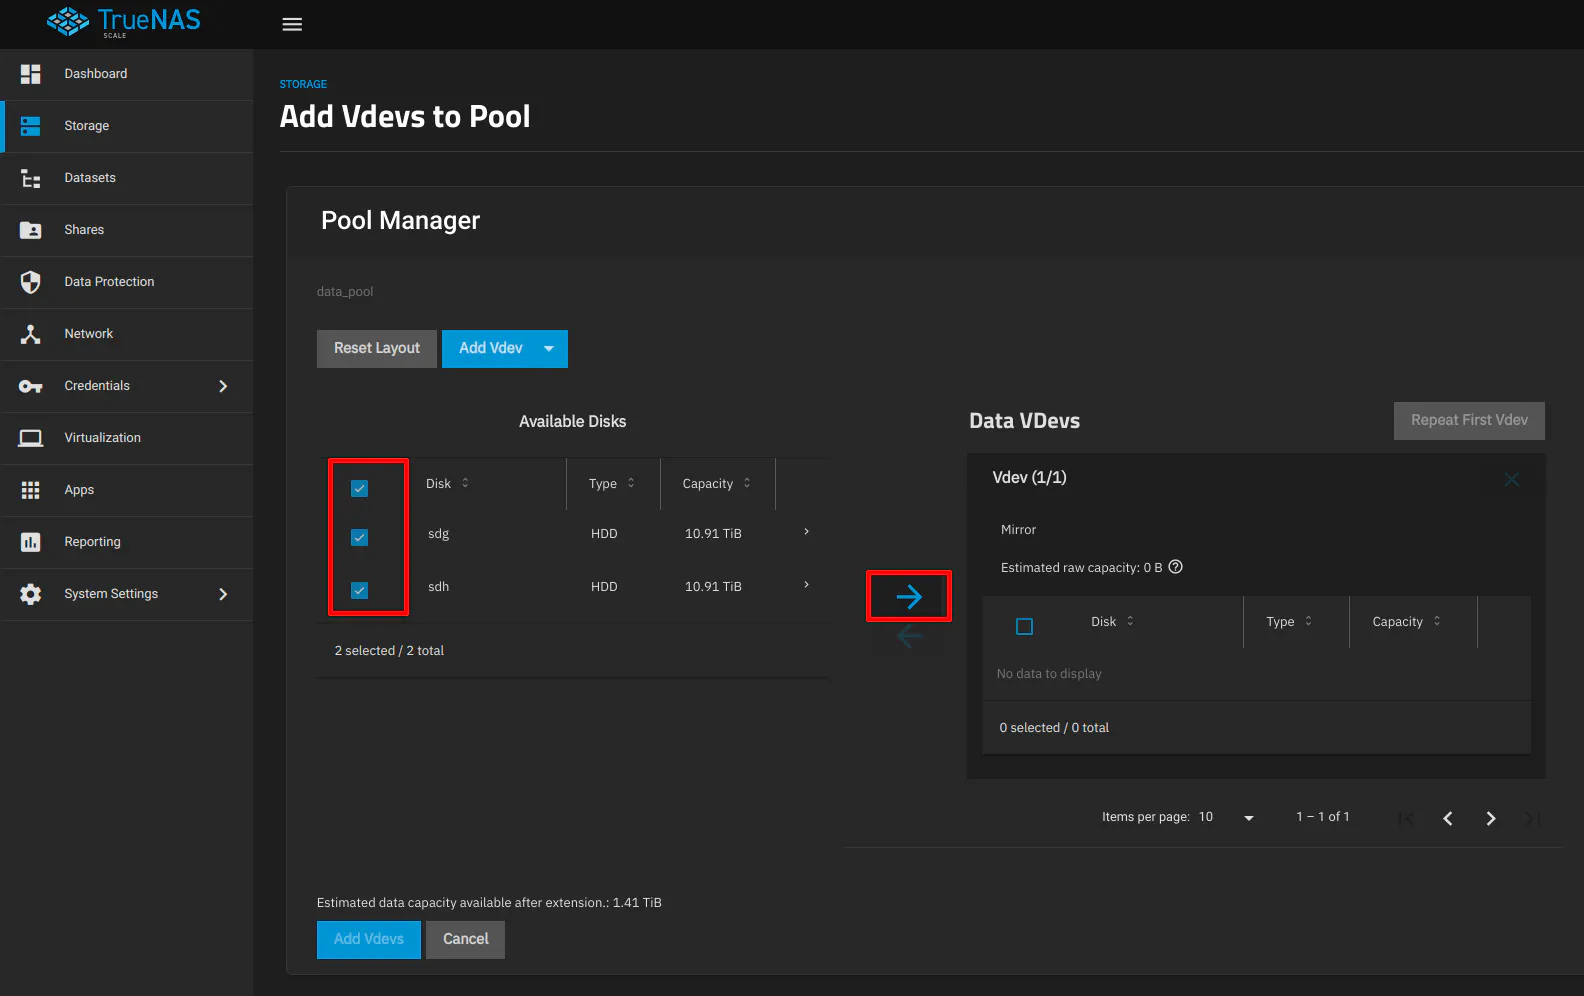
On the “Add Vdevs to Pool” page, select all of the disks on the left side of the page and click the right arrow button to move them to the “Data VDevs” section.
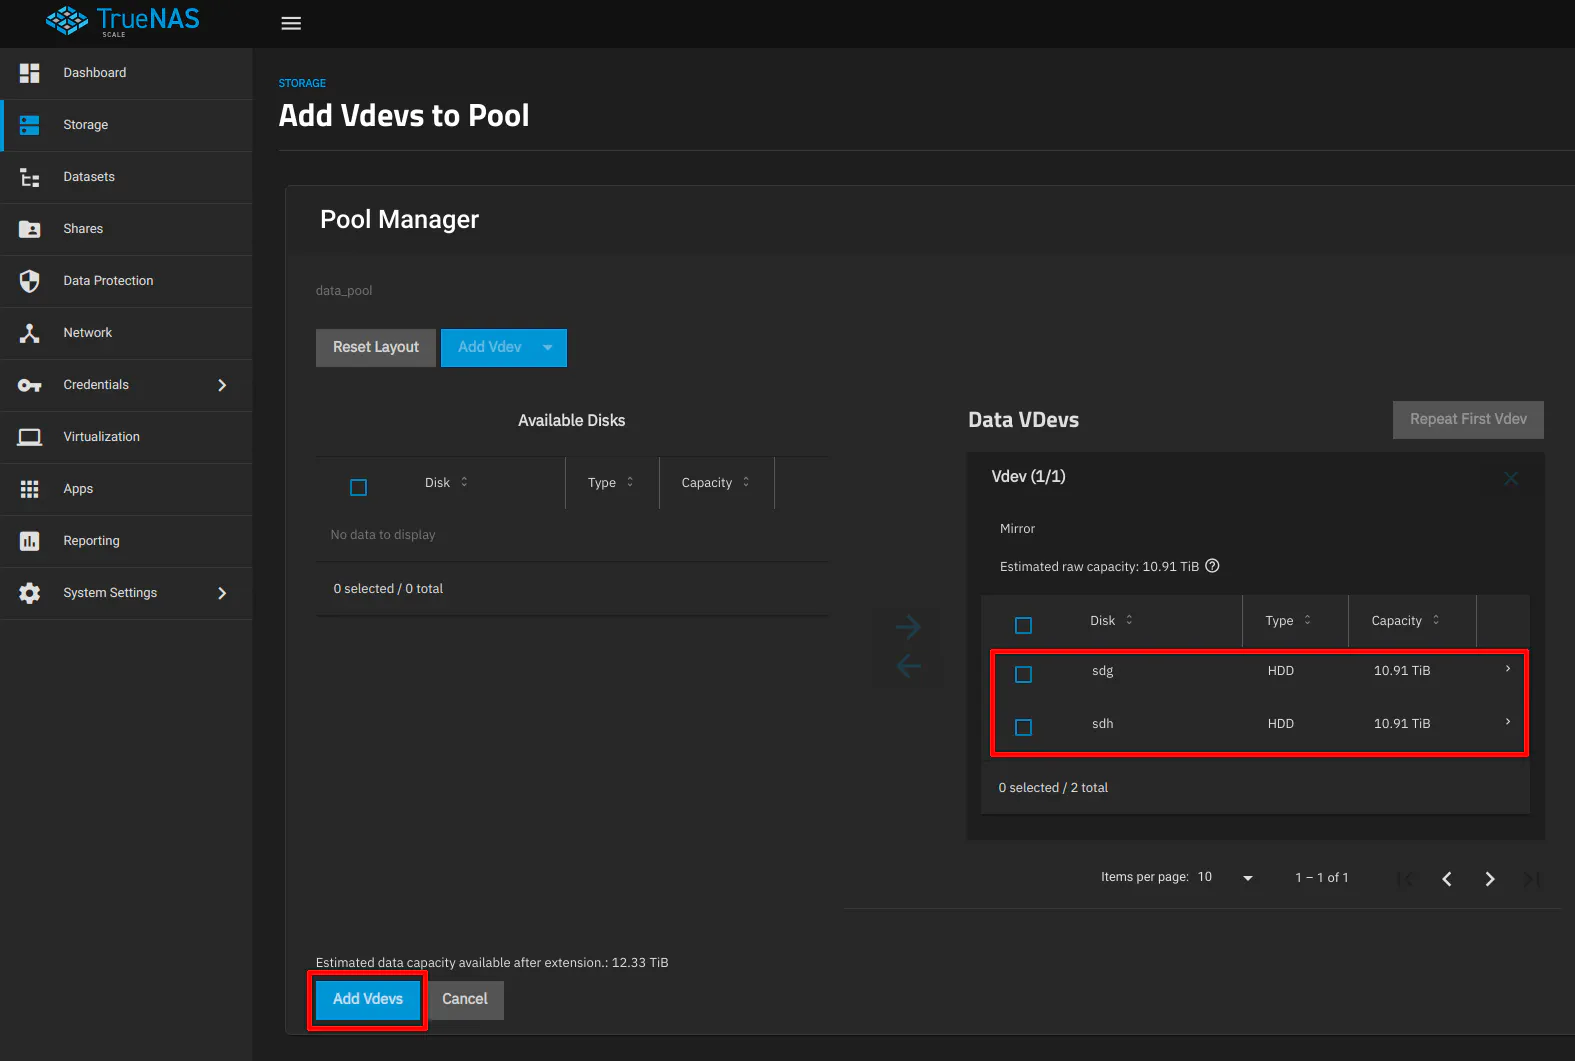
Once the disks have been added to the data vdev, click the “Add Vdevs” button.
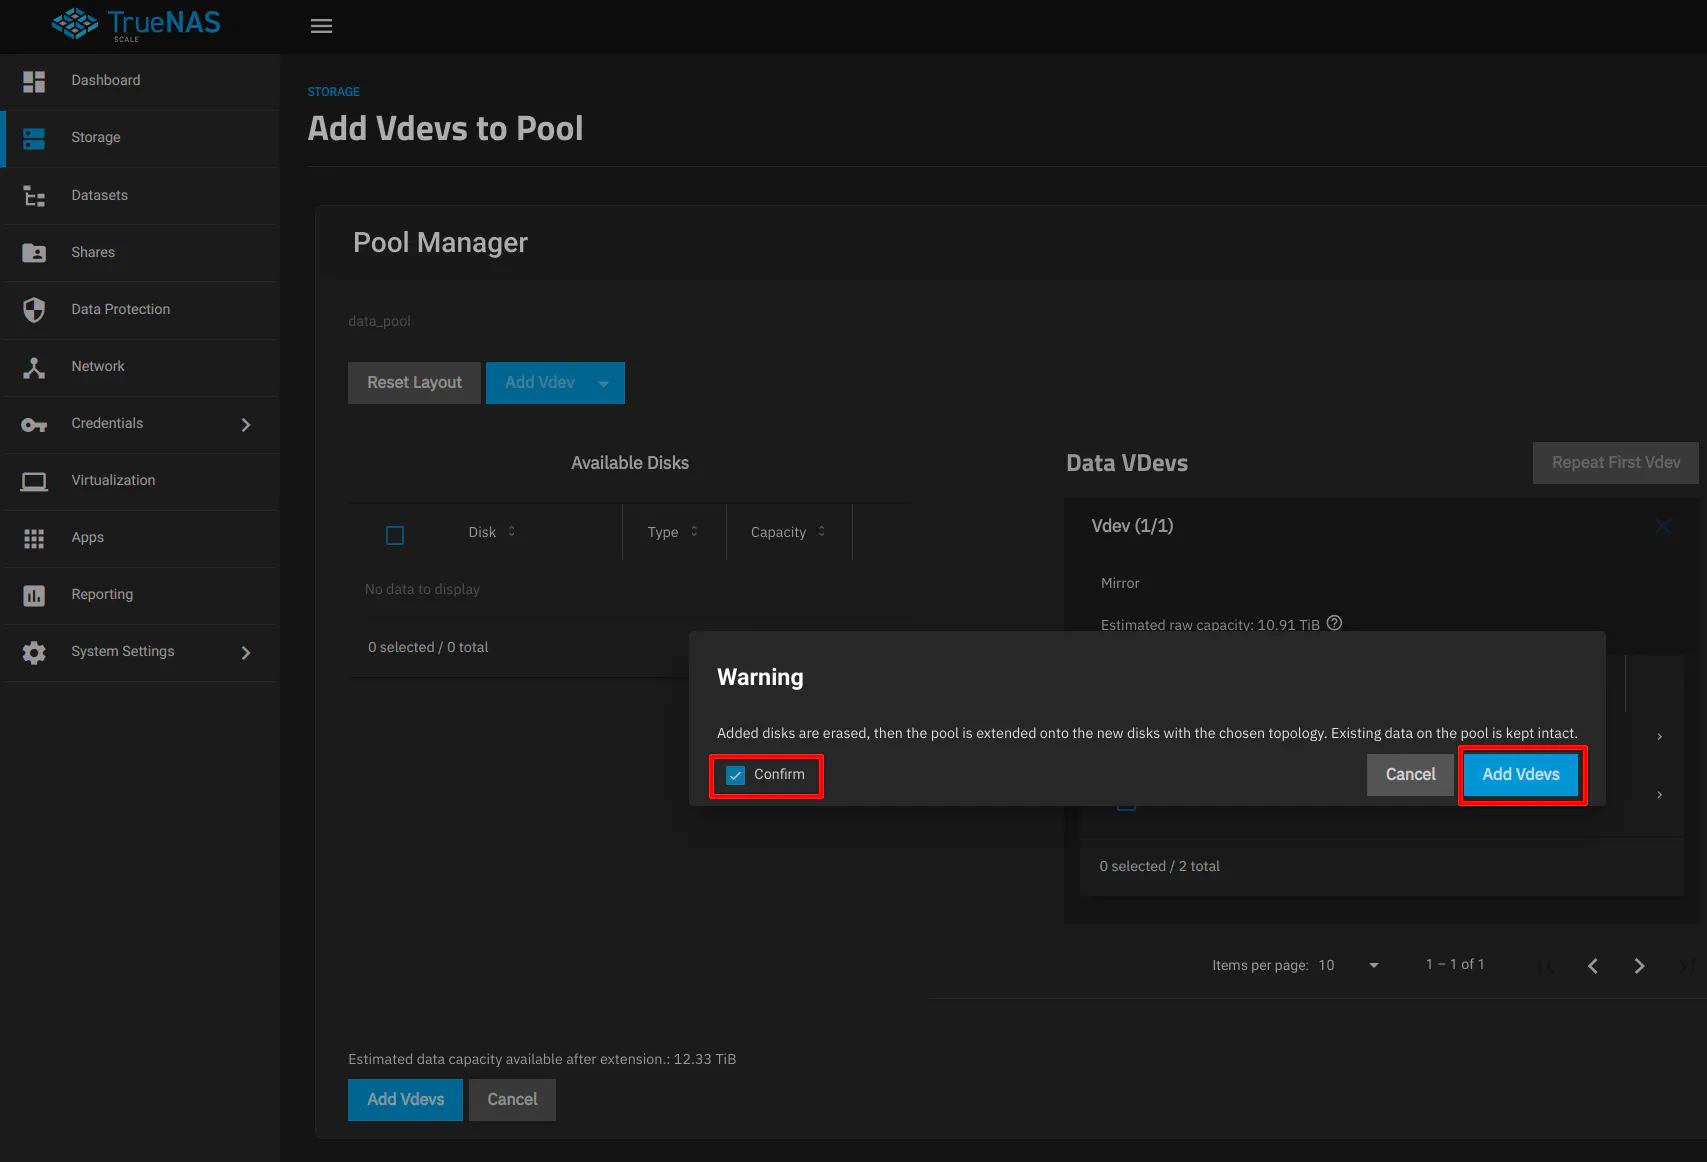
You will see a warning about erasing the disks. Since my disks are brand new, there is no data that will be lost. Click on the “Confirm” checkbox and then click “Add Vdevs”.
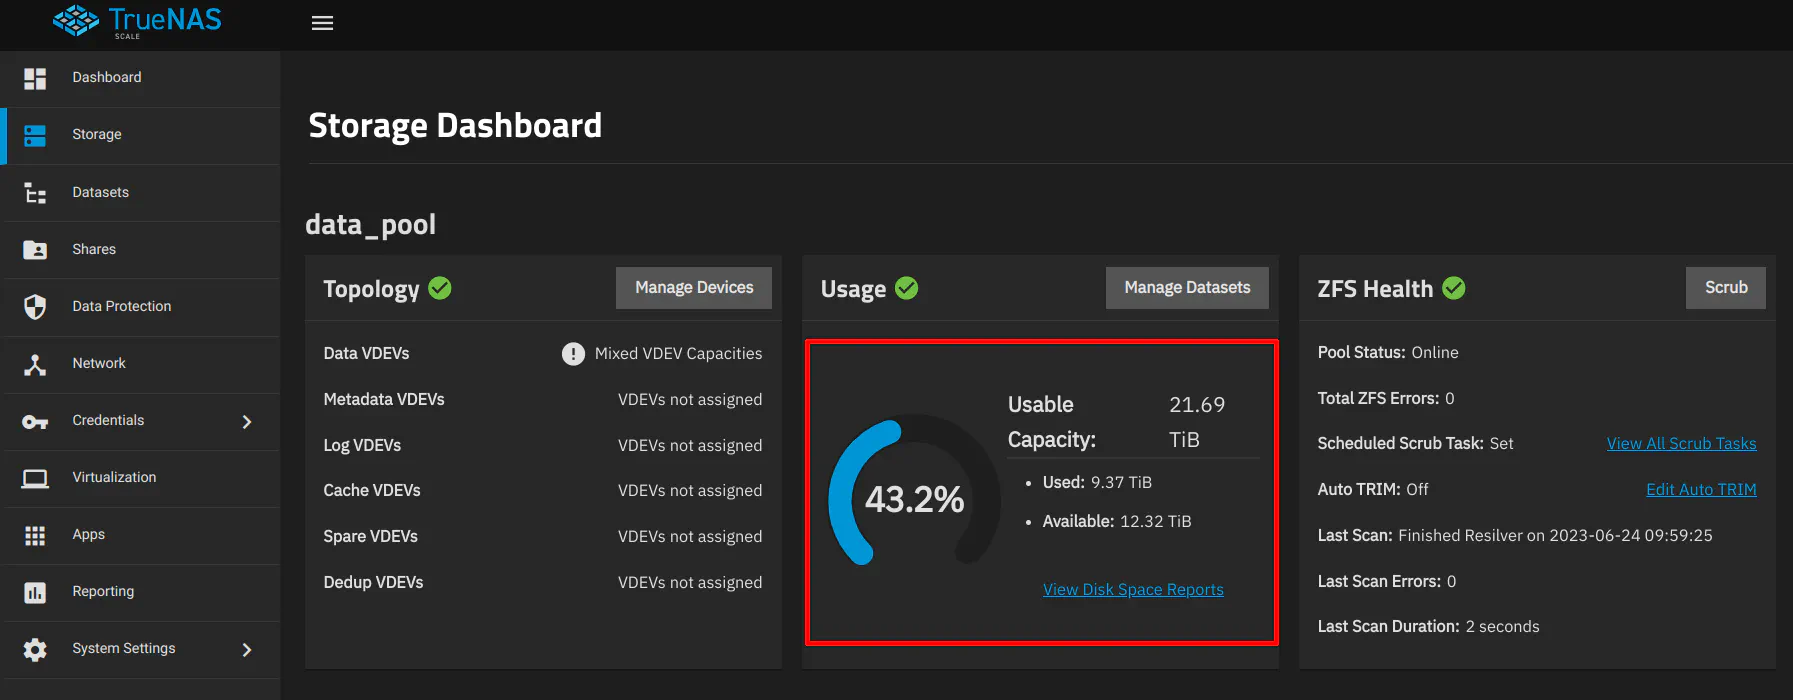
Within a few moments, you will see on your “Storage Dashboard” the increased usable capacity! It really does not take very long for the new capacity to be available, which is great. Now my usable capacity has doubled and the percentage used dropped in half.
That is all there is to adding more capacity to an existing ZFS data pool in TrueNAS! I found the process to be pretty straightforward and very quick. When I recorded the video for YouTube, the process (not counting stopping to take screenshots for this guide) took about 5 minutes and that is with me explaining each step.

